DIY Guide to Creating Your Own Wedding Invites
- Stubbycarrot
- Jul 8, 2019
- 5 min read

Congrats on your engagement!
As daunting as the preparations for your Big Day might seem, they can also be an opportunity for some fun and fulfillment.
So you have most probably browsed through some standard wedding invitation templates but probably either found nothing perfect to your liking or want to go for something a little more personal.
Hopefully, this guide can be of some help for you and your fiance/fiancee if you are searching for ideas for your wedding invitations. This is especially so, if you have taken the courageous/ brave step to DIY (do-it-yourself) your wedding invitation. (Round of applause!!)
Alternatively, if you have engaged a wedding stationer or are planning to, make sure you share your expectations with your wedding stationer at the start in terms of both (i) scheduling and (ii) deliverable specifications. As a gauge, your save-the-dates should be done about 6 months before your wedding date, and the wedding invites at least 4-6 weeks prior!
1. Decide on your wedding theme
Photo credits (clockwise, from top left): The Wedding Scoop, i.pinimg.com, Pinterest, rockmywedding.co.uk
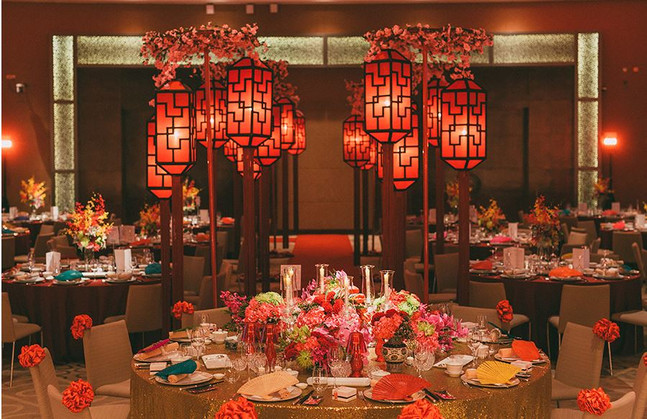
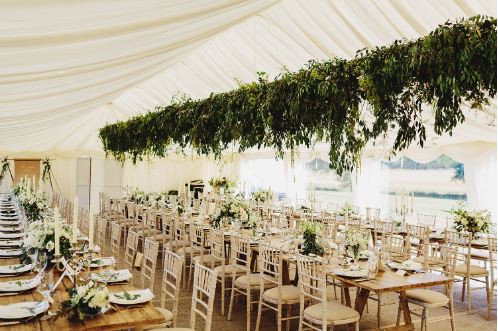
For starters, have an idea of what your wedding theme would be. Your wedding invites are the first indicators to guests on what to expect before your Big Day. Card styles could range from that of a fairy tale garden style party, modern Chinese wedding, beach party, contemporary, monochrome, pastel and dreamy... You get it. The list goes on. (Hint: It is largely dependent on your wedding venue and its ambiance.)
2. Getting your Idea board ready

Feeling at a loss of the endless possibilities? This leads on to my next point. Communicating visual or abstract ideas is often very tricky. This is why I'd strongly recommend that you create your own idea board on Pinterest, which you can share with your wedding designer or stationer. This will help so much in communicating your visions and expectations.
Trust me, your designer will be extremely thankful too!
3. Going into the details

The following list are details which you eventually have to decide on, especially if you are DIY-ing. But if you already have your own wedding stationer, he/she will be sharing her expertise with you.
Specifications of Wedding Invitation Card:
Size of card: The standard is 5" x 7", but then again there are so many other shapes to explore.
Paper type: Glossy or matte; premium or basic? This depends on which printer you go to. Most of them have their own paper catalogue. For a wide selection of paper, you can check out Fancy Papers (in Cityhall). There is also thickness of paper (GSM) to consider. No other way than to feel it out yourself at the print shop!
Embossing: where you raise a pattern/design against the background

Hot-stamping (or foil stamping): where you get shiny surface from pre-dried ink or foils

One-sided or two-sided: If you are interested in creating your own illustrated maps which would be a cute and fun illustration add-on to have, you can check out some tips in my previous post here.
Font and font size: choosing the right fonts add to the character of the piece!
Envelope type: make sure you consider its thickness too
Additional design specifications: Do you want any additional stationery like guests names handwritten on the invites, accessories like a stalk of dried flower, a dash of glitter? These details will affect both the timeline and the cost of these invitations!
4. Wording the Card
Here are some wedding invitation templates which you can use!
--- For formal wedding dinner ---
Together with our parents
Mr and Mrs Tan Meng Teck <Groom's father's name> and Mr and Mrs Harry Lee <Bride's father's name>
Joseph and Mary <Groom and Bride's name>
Request the honour of your presence to share in the joy of their wedding on
Sunday, 7 July 2019
at seven o'clock in the evening
The Fullerton Hotel,
1 Fullerton Square, Singapore 049178
Kindly RSVP
Joseph: <Groom's contact detail> | Mary: <Bride's contact detail>
--- For Christian weddings ---
Together with our parents
Mr and Mrs <Groom's father's name> and Mr and Mrs <Bride's father's name>
Joseph and Mary <Groom and Bride's name>
Request the honour of your presence to share in the joy of their Holy Matrimony on Sunday, 7 July 2019
at six o'clock in the evening
The Fullerton Hotel,
1 Fullerton Square, Singapore 049178
Dinner to follow
Kindly RSVP
Joseph: <Groom's contact detail> | Mary: <Bride's contact detail>
--- For more fun solemnisations/ weddings ---
Together with their families
Samuel and Edith
Invite you to join them as they exchange wedding vows at their solemnisation
on Sunday, 7 July 2019
at six o'clock in the evening
The Fullerton Hotel,
1 Fullerton Square, Singapore 049178
Reception to follow
Kindly RSVP
Samuel: <Groom's contact detail>| Edith: <Bride's contact detail>
--- For traditional Chinese weddings ---
Traditional Chinese wedding invites are an entirely new ball game which deserves a separate post. But just for you, I found an awesome post which has described the intricacies so well. Check it out here!
Bonus Tip
One tip(slash) lifehack I would give is leaving the name of the recipient out on the wedding invitation card. This means you can avoid writing them for an additional round. Writing them once on the envelope is enough (for me, at least). But it depends on you!
When doing the nitty-gritty preparations for your weddings, I'd say, every extra stroke counts. Besides, you don't have to worry about slotting them in the wrong envelope later on. See!
5. Getting them Printed
Looking for an affordable and value-for-money printing vendor? There are so many printing vendors you can find in Sunshine Plaza and Peace Centre. Afterall, this is within the vicinity of Singaporean art schools like SOTA (School of the Arts), Lasalle College of the Arts, NAFA!
6. Do your test prints
I can't emphasise this enough. Whether you DIY your prints, or get your wedding stationer to do it for you, please (please!!) do a pilot print before starting mass printing. (Else, it might turn into mass mayhem :p)
The test print is important for two main reasons.
Firstly, to check that the colour (especially if you DIY them) and borders are in place. Also, to ensure that the font size on the invitation is also visible (don't forget the older folks!)
Also, here's a checklist for you to go through before printing:
All names (parents, groom, bride)
Wedding date, time, venue
Contact number of bride and groom
Other spelling error(s)
7. Finally, mailing them out
Don't forget to check the mailing rates for your postage before mailing them out! Depending on the eventual weight and size of your envelope, you might have to upgrade. If you are unsure, visit your post office where the staff can advise you accordingly.
Did you have your wedding invitation cards DIY-ed? How was your experience?
Let me know if these tips have been useful.
Most important of all, have fun!


Kommentarer